Spring boot Default 예외 처리
예외 처리는 웹 애플리케이션을 만드는 데 있어서 중요한 부분을 차지한다.
Spring Framework는 다양한 예외 처리 방법을 제공하고 있다.
그중에서 먼저 기본적인 예외 처리 방법에 대해 알아보자.
@RestController
@RequestMapping("/public")
@RequiredArgsConstructor
public class TestController {
private final PostService postService;
@GetMapping("/post/{id}")
public ResponseEntity<Post> getPostProcess(@PathVariable Long id) {
return ResponseEntity.ok(postService.getPost(id));
}
}
getPostProcess에서 NoSuchElementFoundException 예외가 발생했다면,
우리는 접속한 환경에 따라 다른 에러 처리를 받게 될 것이다.
만약 우리가 웹페이지로 접속했다면 다음과 같은 whiltelabel 에러 페이지를 반환받는다.
Spring이 기본으로 설정해 놓은 Whitelavel Error Page이다.
응답 코드나, 예외 상황에 따라 클라이언트에게 보여줄
HTML 페이지나 응답할 JSON 객체에 대해 설정해야 한다.

Spring은 만들어질 때(1.0)부터 에러 처리를 위한 BasicErrorController를 구현해 두었고,
Spring boot는 예외가 발생하면 기본적으로
/error로 에러 요청을 다시 전달하도록 WAS 설정을 해두었다.
그래서 별도의 설정이 없다면 예외 발생 시에 BasicErrorController로 에러 처리 요청이 전달된다.
참고로 이는 Spring boot의 WebMvcAutoConfiguration를 통해 자동 설정이 되는 WAS의 설정이다.
여기서 요청이 /error로 다시 전달된다는 부분에 주목해야 한다.
일반적인 요청 흐름은 다음과 같이 진행된다.
■ WAS(톰캣) ▷ 필터 ▷ 서블릿(디스패처 서블릿) ▷ 인터셉터 ▷ 컨트롤러
그리고 컨트롤러 하위에서 예외가 발생하였을 때,
별도의 예외 처리를 하지 않으면 WAS까지 에러가 전달된다.
그러면 WAS는 애플리케이션에서 처리를 못하는 예외라,
exception이 올라왔다고 판단을 하고, 대응 작업을 진행한다.
■ 컨트롤러 (예외 발생) ▷ 인터셉터 ▷ 서블릿(디스패처 서블릿) ▷ 필터 ▷ WAS(톰캣)
WAS는 스프링 부트가 등록한 에러 설정(/error)에 맞게 요청을 전달하는데,
이러한 흐름을 총 정리하면 다음과 같다.
WAS(톰캣) ▷ 필터 ▷ 서블릿(디스패처 서블릿) ▷ 인터셉터 ▷ 컨트롤러
컨트롤러 (예외 발생) ▷ 인터셉터 ▷ 서블릿(디스패처 서블릿) ▷ 필터 ▷ WAS(톰캣)
WAS(톰캣) ▷ 필터 ▷ 서블릿(디스패처 서블릿) ▷ 인터셉터 ▷ 컨트롤러 (BasicErrorController)
기본적인 에러 처리 방식은 결국 에러 컨트롤러를 한번 더 호출하는 것이다.
그러므로 필터나 인터셉터가 다시 호출될 수 있는데, 이를 제어하기 위해서는 별도의 설정이 필요하다.
서블릿은 dispatcherType로 요청의 종류를 구분하는데,
일반적인 요청은 REQUEST이며 에러 처리 요청은 ERROR이다.
필터는 서블릿 기술이므로 필터 등록 시에 호출될 dispatcherType 타입을 설정할 수 있고,
별도의 설정이 없다면 REQUEST일 경우에만 필터가 호출된다.
하지만 인터셉터는 Spring 기술이므로 dispatcherType을 설정할 수 없어 URI 패턴으로 처리해야 한다.
Spring boot에서는 WAS까지 직접 제어하게 되면서 이러한 WAS의 에러 설정까지 가능해졌다.
또한 이는 요청이 2번 생기는 것은 아니고, 1번의 요청이 2번 전달되는 것이다.
그러므로 클라이언트는 이러한 에러 처리 작업이 진행되었는지 알 수 없다.
BasicErrorController
BasicErrorController는 accept 헤더에 따라 에러 페이지를 반환하거나 에러 메시지를 반환한다.
Spring Boot는 오류가 발생하면 server.error.path에 설정된 경로에서 요청을 처리하게 한다.
Spring Boot에서는 기본적으로 BasicErrorController가 등록이 되어 해당 요청을 처리하게 된다.
BasicErrorController는 아래와 같이 구현되어 있다.
에러 경로는 기본적으로 /error로 정의되어 있으며 properties에서 server.error.path로 변경할 수 있다.
@Controller
@RequestMapping("${server.error.path:${error.path:/error}}")
public class BasicErrorController extends AbstractErrorController {
private final ErrorProperties errorProperties;
//...
// 헤더의 미디어 타입이 text/html일 때 호출되는 컨트롤러 메소드
@RequestMapping(produces = MediaType.TEXT_HTML_VALUE)
public ModelAndView errorHtml(HttpServletRequest request, HttpServletResponse response) {
HttpStatus status = getStatus(request);
Map<String, Object> model = Collections
.unmodifiableMap(getErrorAttributes(request, getErrorAttributeOptions(request, MediaType.TEXT_HTML)));
response.setStatus(status.value());
ModelAndView modelAndView = resolveErrorView(request, response, status, model);
return (modelAndView != null) ? modelAndView : new ModelAndView("error", model);
}
// 헤더의 미디어 타입이 text/html이 아닐 경우 호출되는 컨트롤러 메소드
@RequestMapping
public ResponseEntity<Map<String, Object>> error(HttpServletRequest request) {
HttpStatus status = getStatus(request);
if (status == HttpStatus.NO_CONTENT) {
return new ResponseEntity<>(status);
}
Map<String, Object> body = getErrorAttributes(request, getErrorAttributeOptions(request, MediaType.ALL));
return new ResponseEntity<>(body, status);
}
// ...
protected ErrorAttributeOptions getErrorAttributeOptions(HttpServletRequest request, MediaType mediaType) {
ErrorAttributeOptions options = ErrorAttributeOptions.defaults();
if (this.errorProperties.isIncludeException()) {
options = options.including(Include.EXCEPTION);
}
if (isIncludeStackTrace(request, mediaType)) {
options = options.including(Include.STACK_TRACE);
}
if (isIncludeMessage(request, mediaType)) {
options = options.including(Include.MESSAGE);
}
if (isIncludeBindingErrors(request, mediaType)) {
options = options.including(Include.BINDING_ERRORS);
}
return options;
}
}
errorHtml()과 error()는 모두 getErrorAttributeOptions를 호출해 반환할 에러 속성을 얻는데,
기본적으로 DefaultErrorAttributes로부터 반환할 정보를 가져온다.
BasicErrorController의 흐름을 정리하면 다음과 같다.
- Spring 환경 내에 server.error.path으로 등록된 property의 값을 넣거나,
없는 경우 /error를 사용한다. - HTML로 응답을 주는 경우 errorHtml 메소드에서 응답을 처리한다.
- HTML 외의 응답이 필요한 경우 error 메소드에서 처리한다.
- 실질적으로 view에 보낼 model을 생성한다
HTML View 연계
BasicErrorController는 위에서 본 것처럼 기본적인 로직이 모두 구현되어 있으므로,
오류 페이지 화면만 BasicErrorController가 제공하는 규칙과 우선순위에 따라 등록하면 된다.
즉 whiltelabel 페이지가 아닌 Custom 오류 페이지를 만들 수가 있다.
(정적 HTML이면) 정적 리소스, (뷰 템플릿 활용해 동적 오류 화면을 만들고 싶은 경우)
뷰 템플릿 경로에 오류 페이지 파일을 만들어서 넣어두기만 하면 되는 것이다.
뷰 선택 우선순위
BasicErrorController의 뷰 선택 처리 우선순서를 먼저 알아야 한다.
1. 뷰 템플릿
- resources/templates/error/500.html
- resources/templates/error/5xx.html
2. 정적 리소스(static, public)
- resources/static/error/400.html
- resources/static/error/404.html
- resources/static/error/4xx.html
3. 적용 대상이 없을 때 뷰 이름(error)
- resources/templates/error.html
해당 경로에 HTTP 상태 코드 이름의 뷰 파일을 넣어두면 된다.
뷰 템플릿이 정적 리소스보다 우선순위가 높고,
404, 500처럼 구체적인 것이 5xx처럼 덜 구체적인 것보다 우선순위가 높다.
5xx, 4xx라고 파일명을 지정해 두면 500대, 400대 오류를 처리해 준다.
다음으로 오류 정보 포함 여부에 대한 설정이 필요하다.
이에 대한 설정은 application.properties에서 가능하다.
# Server error
server.error.include-exception=true
server.error.include-message=on_param
server.error.include-stacktrace=on_param
server.error.include-binding-errors=on_param
기본값이 never인 부분은 다음 3가지 옵션을 사용할 수 있다.
never : 사용하지 않음.
always : 항상 사용
on_param : 파라미터가 있을 때 사용. (파라미터가 있을 때만 정보 노출)
on_param 설정 후 HTTP 요청 시 파라미터를 전달하면
해당 정보들이 model에 담겨서 뷰 템플릿에 출력된다.
ex) http://localhost:8080/error?message=true&errors=true&trace=true
다음은 Custom 오류 페이지를 사용하는 예시이다.
<!DOCTYPE HTML>
<html xmlns:th="http://www.thymeleaf.org" lang="ko">
<head>
<meta charset="utf-8">
<title>Error Page</title>
<style>
body{
background: black;
}
.container{
background: black;
text-align: center;
color:white;
font-weight: bold;
padding:0;
}
ul{
list-style: none;
padding:0;
color:red;
font-weight: bold;
}
</style>
</head>
<body>
<div class="container">
<div class="py-5 text-center">
<h2>Server 500</h2>
</div>
<div>
<p>Custom Error Page</p>
</div>
<ul>
<li>Error Info</li>
<li th:text="|timestamp: ${timestamp}|"></li>
<li th:text="|path: ${path}|"></li>
<li th:text="|status: ${status}|"></li>
<li th:text="|message: ${message}|"></li>
<li th:text="|error: ${error}|"></li>
<li th:text="|exception: ${exception}|"></li>
<li th:text="|errors: ${errors}|"></li>
<li th:text="|trace: ${trace}|"></li>
</ul>
<hr class="my-4">
</div>
</body>
</html>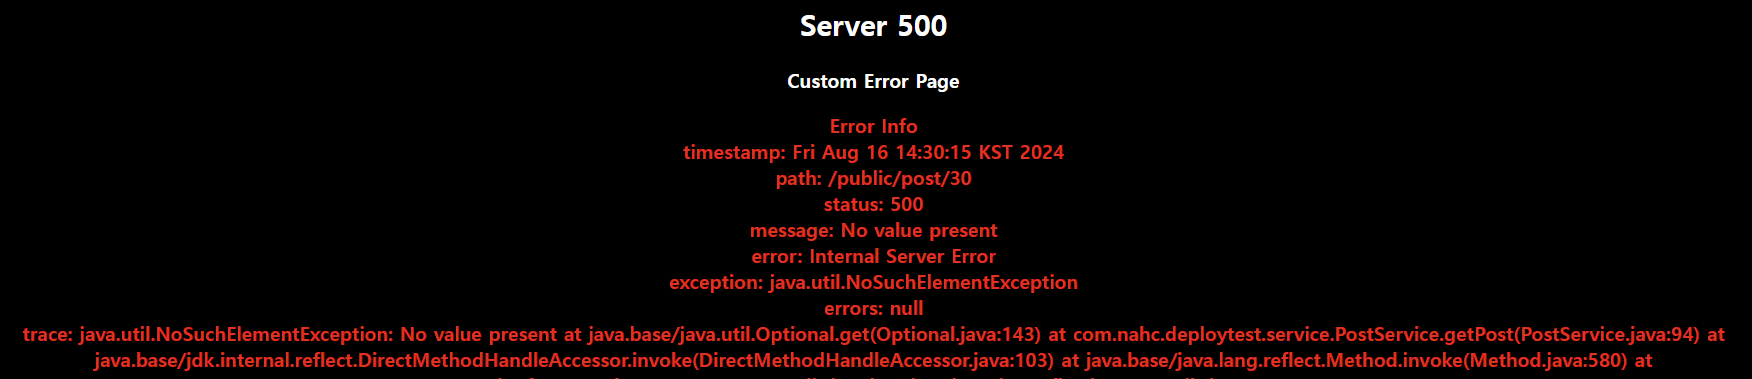
하지만 이러한 오류 관련 정보는 고객들에게 노출하는 것은 보안상 문제 때문에 좋지 않다.
따라서 BasicErrorController는 오류 정보를 model에 포함할 지에 대한 여부를 개발자에게 맡기고,
위와 같은 옵션을 활용하여 Model에 데이터의 전달 여부를 결정해야 한다.
AbstractErrorController / ErrorAttributes
public abstract class AbstractErrorController implements ErrorController {
private final ErrorAttributes errorAttributes;
protected Map<String, Object> getErrorAttributes(HttpServletRequest request, ErrorAttributeOptions options) {
WebRequest webRequest = new ServletWebRequest(request);
return this.errorAttributes.getErrorAttributes(webRequest, options);
}
}
getErrorAttributes()를 조금 더 살펴보면 다음과 같다.
해당 메소드는 BasicErrorController의 상위 클래스인 AbstractErrorController에 구현되어 있다.
구현된 내용을 보면 ErrorAttributes 인터페이스의 getErrorAttributes를 호출하는 것을 알 수 있다.
별도로 ErrorAttributes를 등록하지 않았다면 Spring Boot는 DefaultErrorAttributes를 사용한다.
아래는 DefaultErrorAttributes의 일부 내용이다.
public interface ErrorAttributes{
default Map<String, Object> getErrorAttributes(WebRequest webRequest, ErrorAttributeOptions options) {
return Collections.emptyMap();
}
Throwable getError(WebRequest webRequest);
}
@Order(Ordered.HIGHEST_PRECEDENCE)
public class DefaultErrorAttributes implements ErrorAttributes, HandlerExceptionResolver, Ordered {
@Override
public Map<String, Object> getErrorAttributes(WebRequest webRequest, ErrorAttributeOptions options) {
Map<String, Object> errorAttributes = getErrorAttributes(webRequest, options.isIncluded(Include.STACK_TRACE));
if (!options.isIncluded(Include.EXCEPTION)) {
errorAttributes.remove("exception");
}
if (!options.isIncluded(Include.STACK_TRACE)) {
errorAttributes.remove("trace");
}
if (!options.isIncluded(Include.MESSAGE) && errorAttributes.get("message") != null) {
errorAttributes.remove("message");
}
if (!options.isIncluded(Include.BINDING_ERRORS)) {
errorAttributes.remove("errors");
}
return errorAttributes;
}
private Map<String, Object> getErrorAttributes(WebRequest webRequest, boolean includeStackTrace) {
Map<String, Object> errorAttributes = new LinkedHashMap<>();
errorAttributes.put("timestamp", new Date());
addStatus(errorAttributes, webRequest);
addErrorDetails(errorAttributes, webRequest, includeStackTrace);
addPath(errorAttributes, webRequest);
return errorAttributes;
}
}
위의 코드에서 나타나는 것처럼,
DefaultErrorAttributes는 전체 항목들에서 설정에 맞게 불필요한 속성들을 제거한다.
- timestamp : 에러가 발생 시간
- status : 에러의 Http 상태
- error : 에러 코드
- path : 에러가 발생한 uri
- exception : 최상위 예외 클래스의 이름
- message : 에러에 대한 내용
- errors : BindingExecption에 의해 생긴 에러 목록
- trace : 에러 Stack Trace
전체 항목에 대한 설정을 application.properties에서 진행하고,
오류에 대한 Json 응답을 살펴보면 다음과 같이 설정에 따라 출력된다.
{
"timestamp": "2024-08-16T04:54:17.959+00:00",
"status": 500,
"error": "Internal Server Error",
"trace": "java.util.NoSuchElementException: No value present...",
"message": "No value present",
"path": "/public/post/30"
}
위는 기본 설정으로 받는 에러 응답인데, 클라이언트 입장에서 유용하지 못하다.
클라이언트는 “Post with id 30 not found”라는 메시지와 함께
404 status로 에러 응답을 받으면 훨씬 유용할 것이다.
다음과 같이 properties를 통해 에러 응답을 조정할 수 있다.
물론 운영 환경에서 구현이 노출되는 trace는 제공하지 않는 것이 좋다.
# Server error Remove Trace
server.error.include-stacktrace= never
server.error.include-exception= false{
"timestamp": "2024-08-16T03:38:06.978+00:00",
"status": 500,
"error": "Internal Server Error",
"message": "No value present",
"path": "/public/post/30"
}
하지만 설정을 변경했음에도 불구하고 status는 여전히 500이며,
유의미한 에러 응답을 전달하지 못한다. 왜냐하면 WAS가 에러를 전달받았기 때문이다.
또한 흔히 사용되는 API 에러 처리 응답으로는 보다 세밀한 제어가 요구된다.
그러므로 우리는 별도의 에러 처리 전략을 통해 상황에 맞는 에러 응답을 제공해야 한다.
그렇다면 Spring에서 Default 예외처리 외에 어떤 예외처리 방법을 제공하고 있을까?
Java에서는 예외 처리를 위해 try-catch를 사용해야 하지만
try-catch를 모든 코드에 붙이는 것은 비효율적이다.
Spring은 에러 처리라는 공통 관심사를 메인 로직으로부터 분리하는 여러 예외 처리 방식을 고안하였고,
예외 처리 전략을 추상화한 HandlerExceptionResolver 인터페이스를 만들었다.
대부분의 HandlerExceptionResolver는
발생한 Exception을 catch 하고 HTTP 상태나 응답 메시지 등을 설정한다.
그래서 WAS 입장에서는 해당 요청이 정상적인 응답인 것으로 인식되며,
위에서의 WAS의 에러 전달이 진행되지 않는다.
참고자료
https://mangkyu.tistory.com/204
https://dodeon.gitbook.io/study/kimyounghan-spring-mvc/12-exception/spring-boot-error-page
'IT > Spring boot' 카테고리의 다른 글
| [Spring boot] Spring의 다양한 에러 처리 (1) | 2024.08.18 |
|---|---|
| [Spring boot] HandlerExceptionResolver Custom 예외 처리 (1) | 2024.08.16 |
| [Spring boot] Ck Editor5 파일 업로드 최적화 과정 (0) | 2024.08.12 |
| [Spring boot] Ck Editor5 파일 업로드 구현 (0) | 2024.08.12 |
| [Spring boot] EntityManager & JPA Entity Life Cycle (0) | 2024.08.11 |


